Synchronizing a Blackfly or Grasshopper3 GigE Camera’s Time to PC Time
Download PDF - Synchronizing_GigE_Time
GigE Vision Timestamps
Point Grey’s BFLY-PGE and GS3-PGE cameras support two timestamp values in each image transmission.
- GigE Vision image leader timestamp
- GigE Vision chunk data (by selecting timestamp as chunk data)
Image Leader Timestamp
GigE Vision image leader timestamp is automatically included at the image transmission level.
Convert image leader timestamp to real world time as follows:
Camera_time (ns) = Image_leader_timestamp (tick) * 8 (ns/tick)
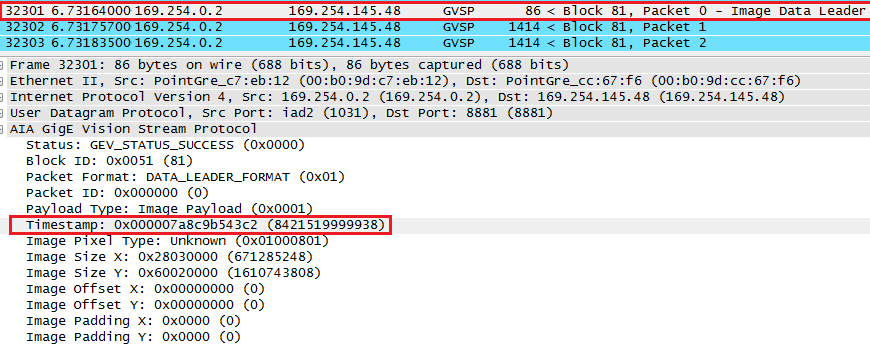
Wireshark Log Showing Image Leader Packet Contains Timestamp
Chunk Data Timestamp
GigE Vision chunk data timestamp can be enabled in any GigE Vision application.
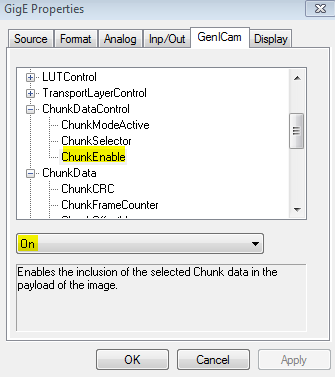
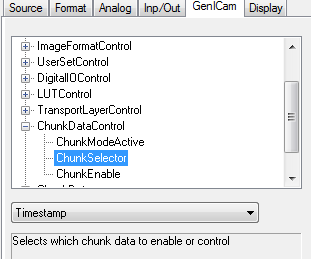
Enabling Chunk Image Timestamp in A&B Software’s ActiveGigE Software
Convert chunk image timestamp to real world time as follows:
Camera_time (ns) = Chunk_image_timestamp (tick) * 8 (ns/tick)
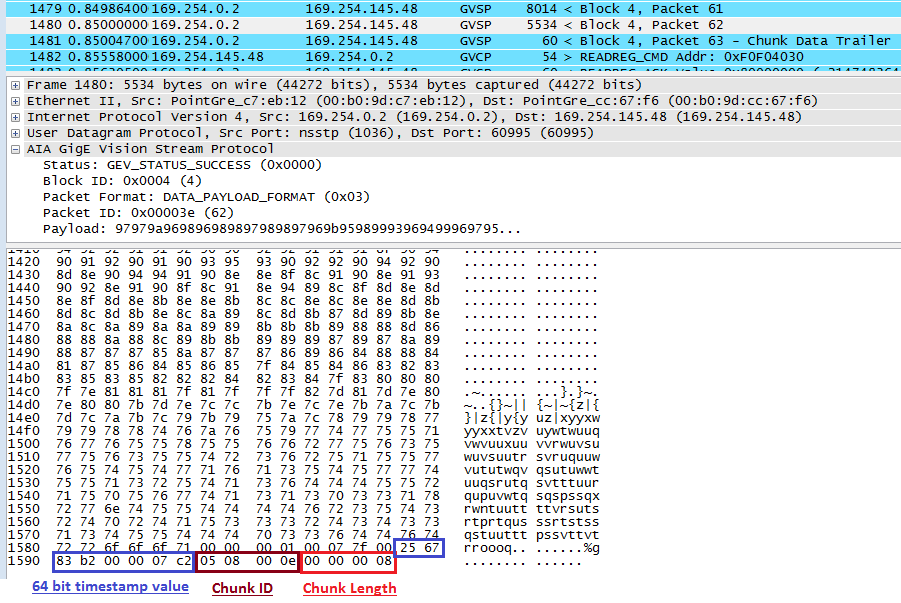
Wireshark Log Showing Chunk Image Timestamp
Point Grey’s BFLY-PGE and GS3-PGE cameras' timestamp is based on an internal clock. The value of this internal clock can be retrieved by using the “Latch Timestamp” feature.
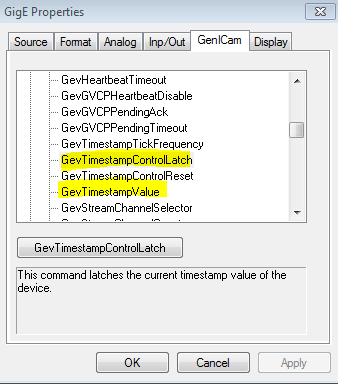
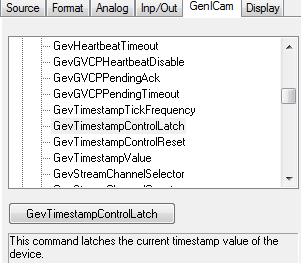
A&B Software’s ActiveGigE Properties Page
Convert latched timestamp to camera time as follows:
Camera_time (ns) = Latched_timestamp (tick) * 8 (ns/tick)
For every image, chunk image timestamp and leader timestamp should return an identical value:
Chunk image timestamp (64-bit value) = Leader timestamp (64-bit value)
Please note: Point Grey’s FlyCapture1 and FlyCapture2 software does not support timestamp latch and chunk image timestamp.
Example Synchronization Method
In this example, we synchronize the camera’s internal time with PC time by first obtaining an offset. Then, we take a sample image and convert the chunk image timestamp to PC time. The goal would be to find out when (according to PC time) each image is taken.
For simplicity, we use the unit “seconds” for our calculation. Point Grey cameras support nanosecond resolution.
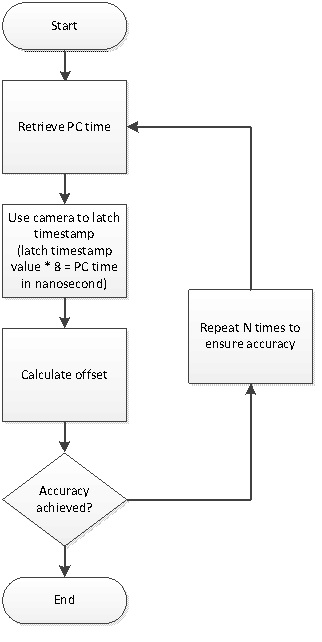
First relate camera’s internal clock to PC clock by obtaining the time offset.
1. Retrieve PC time (using Windows SYSTEMTIME struct)
- Current PC time 10:00 am and 30 seconds
2. Use camera to latch timestamp
- Latched timestamp value = “134005590072”
- Use the formula below to convert latched timestamp to camera time
Camera_time (ns) = Latched_timestamp (tick) * 8 (ns /tick)
Camera_time = 134005590072 tick * 8 ns/tick = 1072 seconds
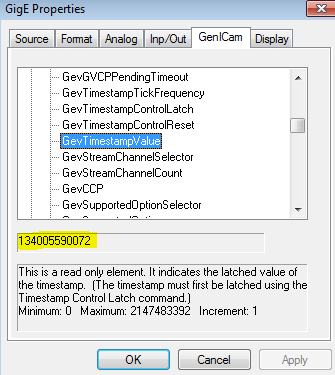
A&B Software’s ActiveGigE Showing Latched Timestamp Value
3. Calculate offset
- 10:00 am and 30 second equal to 36030 seconds since midnight (12:00 am)
- PC time 36030 seconds equates to camera time 1072 seconds
Offset = PC_time (s) – Camera_time (s)
Offset = 36030 (s) – 1072 (s)= 34958 (s)
At this point, we know that if we retrieve the chunk image timestamp plus 34958 seconds, it is equal to our PC time relative to midnight.
Next, for every image captured, decode either the leader timestamp or the chunk image timestamp. Then use the offset calculated from above to translate camera time to PC time.
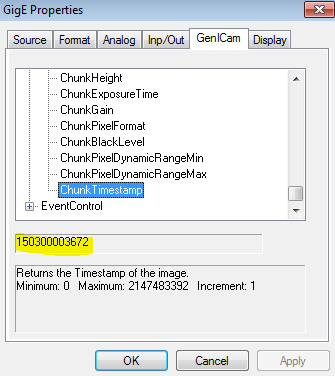
A&B Software’s ActiveGigE Showing Chunk Image Timestamp Value
We capture an image with chunk timestamp enabled.
Camera_time (ns) = Chunk_image_timestamp (tick) * 8 (ns/tick)
Camera_time = 150300003672 * 8 (ns) = 1202 (s)
The current PC time would be:
PC_time (s) = Camera_time (s) + Offset (s)
PC_time (s) = 1202 (s) + 34958 (s) = 36180 (s)
36180 seconds since midnight, which equates to 10:03 am. This sample image is taken at PC time 10:03 am.
Zugehörige Artikel
-
 Fallstudie
Intelligentes Verkehrsmanagement in Darmstadt
Bericht lesen -
 Fallstudie
Intelligente Verkehrssensoren lindern das Stauproblem in Moskau, Russland
Bericht lesen -
 Fallstudie
Videobasierte automatische Vorfallerkennung und Verkehrsstatistik im Clem Jones-Tunnel – Brisbane, Australien.
Bericht lesen